先说明下本人的软硬件环境:
硬件环境 OS 环境: Ubuntu 18.04.2 LTS X64 Desktop内核版本: Linux version 4.15.0-51-generic (buildd@lgw01-amd64-059) (gcc version 7.3.0 (Ubuntu 7.3.0-16ubuntu3))硬件环境:
CPU:Intel(R) Core(TM) i7-7700 CPU @ 3.60GHz (四核心八线程)
内存:16G DDR4 2400 MT/s
硬盘:1T 机械硬盘
带宽:联通 300Mbits
编译 Android 的前提
OpenJDK 7 (注意:不能是 Oracal JDK 7)
GNU Make 3.81 到 3.82
Git 1.7 或更高版本
本人实际软件环境
java version “1.7.0_161” OpenJDK 64-Bit
Python 2.7.15+
GNU Make 3.82
git version 2.17.1
下载 Android 源代码 下载 repo 工具: 1 2 3 4 $ mkdir ~/bin $ PATH=~/bin:$PATH $ curl https://storage.googleapis.com/git-repo-downloads/repo > ~/bin/repo $ chmod a+x ~/bin/repo
建立工作目录 1 2 $ mkdir -p ~/android-source/android-5.1.1_r26/ $ cd ~/android-source/android-5.1.1_r26/
修改仓库下载地址 由于众所周知的原因,国内下载 Google 的东西,需要自备梯子。因此需要将下载仓库的地址修改成国内的镜像。我这边使用的是清华大学提供的镜像地址:
将其中的 REPO_URL 修改成清华的镜像地址:
1 REPO_URL = 'https://gerrit-google.tuna.tsinghua.edu.cn/git-repo'
初始化 Git 账号 1 2 $ git config --global user.email <your email> $ git config --global user.name <your name>
初始化仓库 1 2 3 4 $ cd ~/android-source/android-5.1.1_r26/ $ repo init -u https://aosp.tuna.tsinghua.edu.cn/platform/manifest # 或 $ repo init -u git://aosp.tuna.tsinghua.edu.cn/aosp/platform/manifest
使用特别 Android 版本初始化仓库 1 2 $ cd ~/android-source/android-5.1.1_r26/ $ repo init -u https://aosp.tuna.tsinghua.edu.cn/platform/manifest -b android-5.1.1_r26
同步源码 1 2 $ cd ~/android-source/android-5.1.1_r26/ $ repo sync
同步代码会花费很长时间,是拼网速的时候了。我大概下了 9 个小时左右。
查看 Android 系统的版本号 1 2 $ cd ~/android-source/android-5.1.1_r26/ $ cat build/core/version_defaults.mk
编译原生代码 编译 make 3.82 Ubuntu 自带的 make 版本是 4,而编译 Android 5.1.1 需要 3.81 或 3.82。因此首先需要先编译特定版本的 make。make 方法如下:
1 2 3 4 5 6 7 $ wget ftp://ftp.gnu.org/gnu/make/make-3.82.tar.gz $ cd /opt/ $ sudo tar zxvf ~/Downloads/make-3.82.tar.gz $ cd make-3.82/ $ ./configure $ sudo make $ sudo make install
如果编译过程中,遇到 “alloca 问题”,可按如下方法解决:
1 vim /opt/make-3.82/glob/glob.c
添加一行代码 #define alloca alloca
1 2 3 # if defined _AIX && !defined __GNUC__ # pragma alloca # endif
添加后:
1 2 3 4 # define __alloca alloca # if defined _AIX && !defined __GNUC__ # pragma alloca # endif
编译成功后,会看到如下提示:
1 2 3 4 5 6 7 8 9 10 11 ...... make[2]: Leaving directory '/opt/make-3.82/doc' make[1]: Leaving directory '/opt/make-3.82/doc' make[1]: Entering directory '/opt/make-3.82' make[2]: Entering directory '/opt/make-3.82' test -z "/usr/local/bin" || /bin/mkdir -p "/usr/local/bin" /usr/bin/install -c make '/usr/local/bin' test -z "/usr/local/share/man/man1" || /bin/mkdir -p "/usr/local/share/man/man1" /usr/bin/install -c -m 644 make.1 '/usr/local/share/man/man1' make[2]: Leaving directory '/opt/make-3.82' make[1]: Leaving directory '/opt/make-3.82'
新的 make 会被放到如下位置:/usr/local/bin/make 设置成默认的 make,需要将该版本的版本复制到 /usr/bin/ 下面。(别忘了备份原来版本的 make)
1
2
$ sudo mv /usr/bin/make /usr/bin/make.bak $ sudo cp /usr/local /bin/make /usr/bin/
编译结束后,将 make 文件还原成原来的版本:
1 2 3 $ sudo mv /usr/bin/make /usr/bin/make-3.82.bak $ sudo mv /usr/bin/make.bak /usr/bin/make $ sudo mv /usr/local /bin/make /usr/local /bin/make-3.82.bak
安装 openjdk-7 下载 openjdk-7 及依赖包 以下依赖包需要根据你的系统环境,下载对应的版本。我这边下载的是 amd64 版本
官网地址 openjdk-7-jdk 下载地址 amd64 版本
官网地址 openjdk-7-jre 下载地址 amd64 版本
官网地址 openjdk-7-jre-headless 下载地址 amd64 版本
官网地址 libjpeg62-turbo 下载地址 amd64 版本
官网地址 libfontconfig1 下载地址 amd64 版本
官网地址 fontconfig-config 下载地址 amd64 版本
安装 先安装依赖包,最后安装 openjdk-7-jdk。
1 2 3 4 5 6 $ sudo dpkg -i fontconfig-config_2.13.1-2_all.deb $ sudo dpkg -i libfontconfig1_2.13.1-2_amd64.deb $ sudo dpkg -i libjpeg62-turbo_1.5.2-2+b1_amd64.deb $ sudo dpkg -i openjdk-7-jre-headless_7u161-2.6.12-1_amd64.deb $ sudo dpkg -i openjdk-7-jre_7u161-2.6.12-1_amd64.deb $ sudo dpkg -i openjdk-7-jdk_7u161-2.6.12-1_amd64.deb
配置 安装完后,需要进行基本的配置。配置方法很多,大家自行百度即可。
一定要保证执行 java 和 javac 时,使用的是刚刚安装的版本。
1 2 3 4 5 6 $ java -version java version "1.7.0_161" OpenJDK Runtime Environment (IcedTea 2.6.12) (7u161-2.6.12-1) OpenJDK 64-Bit Server VM (build 24.161-b01, mixed mode) $ javac -version javac 1.7.0_161
下载编译 Andriod 所需的依赖包 1 2 3 4 5 6 7 8 $ sudo apt install mingw-w64 $ sudo apt-get install git gnupg flex bison gperf build-essential zip curl libc6-dev libncurses5-dev:i386 x11proto-core-dev libx11-dev:i386 libreadline6-dev:i386 libgl1-mesa-glx:i386 libgl1-mesa-dev g++-multilib tofrodos python-markdown libxml2-utils xsltproc zlib1g-dev:i386 $ sudo apt-get install libc6-dev-amd64 $ sudo apt-get install bison $ sudo apt-get install g++-multilib $ sudo apt-get install zlib1g-dev $ sudo apt-get install libswitch-perl $ sudo ln -s /usr/lib/i386-linux-gnu/mesa/libGL.so.1 /usr/lib/i386-linux-gnu/libGL.so
下载驱动 因为我们需要将 Android 5.1.1 刷到 Nexus 6 中。因此需要下载 Google 驱动程序 。Nexus 6 对应的 Code Name 是 shamu,Android 5.1.1 r26 对应的细分版本是 LMY48Y。
我下载了如下三个必要驱动:
NFC, Bluetooth, Wifi 下载地址
Media, Audio, Thermal, Touch Screen, Sensors 下载地址
GPS, Audio, Camera, Gestures, Graphics, DRM, Video, Sensors 下载地址
您可以查看更多关于 代号、标签和版本号 的信息。
安装驱动并取得 vendor 文件夹 解压缩上面下载的驱动并执行命令:
1 2 3 4 5 6 7 8 9 10 11 12 $ cd ~/android-source/ $ mkdir 'drivers-Nexus 6 (Mobile) binaries for Android 5.1.1 (LMY48Y)' $ wget https://dl.google.com/dl/android/aosp/broadcom-shamu-lmy48y-d55a6fcd.tgz $ wget https://dl.google.com/dl/android/aosp/moto-shamu-lmy48y-df4284cc.tgz $ wget https://dl.google.com/dl/android/aosp/qcom-shamu-lmy48y-6d077370.tgz $ tar xvf broadcom-shamu-lmy48y-d55a6fcd.tgz $ tar xvf moto-shamu-lmy48y-df4284cc.tgz $ tar xvf qcom-shamu-lmy48y-6d077370.tgz # 执行如下三个命令时,按提示需要输入 "I ACCEPT" $ ./extract-broadcom-shamu.sh $ ./extract-moto-shamu.sh $ ./extract-qcom-shamu.sh
执行完上面的命令后,会得到 vendor 文件夹。
移动 vendor 文件夹自源码目录 1 2 $ cd ~/android-source/android-5.1.1_r26/ $ cp -r ../drivers-Nexus\ 6\ \(Mobile\)\ binaries\ for \ Android\ 5.1.1\ \(LMY48Y\)/vendor/ .
解决潜在的问题 在编译 Android 源代码过程中,很可能是会遇到各种各样的问题,为了减少出现可能,请按如下可能出现的问题中提到的解决办法,提前进行疏通。
Q1 编译代码时,可能会遇到如下问题:
1 2 3 4 5 6 7 8 9 10 11 12 13 14 15 16 17 18 19 20 21 22 23 24 25 26 27 28 ...... including ./system/vold/Android.mk ... including ./tools/external/fat32lib/Android.mk ... host Java: doclava (out/host/common/obj/JAVA_LIBRARIES/doclava_intermediates/classes) target Java: conscrypt (out/target/common/obj/JAVA_LIBRARIES/conscrypt_intermediates/classes) Install: out/host/linux-x86/framework/jarjar.jar target Java: ext (out/target/common/obj/JAVA_LIBRARIES/ext_intermediates/classes) Lex: aidl <= frameworks/base/tools/aidl/aidl_language_l.l Copying: out/target/common/obj/JAVA_LIBRARIES/core-junit_intermediates/classes-jarjar.jar flex-2.5.39: loadlocale.c:130:_nl_intern_locale_data: ?? 'cnt < (sizeof (_nl_value_type_LC_TIME) / sizeof (_nl_value_type_LC_TIME[0]))' ??? Copy: rmtypedefs (out/host/linux-x86/obj/EXECUTABLES/rmtypedefs_intermediates/rmtypedefs) host C++: libaapt_32 <= frameworks/base/tools/aapt/ResourceIdCache.cpp host C++: libaapt_32 <= frameworks/base/tools/aapt/ResourceTable.cpp host C++: libaapt_32 <= frameworks/base/tools/aapt/SourcePos.cpp make: *** [out/host/linux-x86/obj32/EXECUTABLES/aidl_intermediates/aidl_language_l.cpp] 已放弃 (core dumped) make: *** 正在等待未完成的任务.... host C++: libaapt_32 <= frameworks/base/tools/aapt/StringPool.cpp 注: 某些输入文件使用或覆盖了已过时的 API。 注: 有关详细信息, 请使用 -Xlint:deprecation 重新编译。 注: 某些输入文件使用了未经检查或不安全的操作。 注: 有关详细信息, 请使用 -Xlint:unchecked 重新编译。 注: 某些输入文件使用了未经检查或不安全的操作。 注: 有关详细信息, 请使用 -Xlint:unchecked 重新编译。 注: 某些输入文件使用或覆盖了已过时的 API。 注: 有关详细信息, 请使用 -Xlint:deprecation 重新编译。 注: 某些输入文件使用了未经检查或不安全的操作。 注: 有关详细信息, 请使用 -Xlint:unchecked 重新编译。 make: *** wait: 没有子进程。 停止。
执行如下代码即可:
1 2 $ cd ~/android-source/android-5.1.1_r26/ $ export LC_ALL=C
Q2 编译代码时,可能会遇到如下问题:
1 2 3 4 5 6 7 8 9 10 ...... libnativehelper/JniInvocation.cpp:165: error: unsupported reloc 43 libnativehelper/JniInvocation.cpp:165: error: unsupported reloc 43 libnativehelper/JniInvocation.cpp:165: error: unsupported reloc 43 clang: error: linker command failed with exit code 1 (use -v to see invocation) make: *** [out/host/linux-x86/obj32/lib/libnativehelper.so] Error 1 make: *** Waiting for unfinished jobs.... host C++: libc++ <= external/libcxx/src/exception.cpp host StaticLib: libc++abi_32 (out/host/linux-x86/obj32/STATIC_LIBRARIES/libc++abi_intermediates/libc++abi.a) Command exited with non-zero status 2
需要执行如下命令:
1 2 3 $ cd ~/android-source/android-5.1.1_r26/ $ mv prebuilts/gcc/linux-x86/host/x86_64-linux-glibc2.11-4.6/x86_64-linux/bin/ld prebuilts/gcc/linux-x86/host/x86_64-linux-glibc2.11-4.6/x86_64-linux/bin/ld.bak $ cp /usr/bin/ld.gold prebuilts/gcc/linux-x86/host/x86_64-linux-glibc2.11-4.6/x86_64-linux/bin/ld
Q3 编译代码时,可能会遇到如下问题:
1 2 3 4 5 6 7 8 9 10 11 12 13 14 15 16 17 18 19 20 21 22 23 24 25 26 27 28 ...... out/target/common/obj/PACKAGING/public_api.txt:116: error 5: Added public field android.Manifest.permission.RECEIVE_EMERGENCY_BROADCAST Checking API: checksystemapi-last Checking API: checksystemapi-current Copying: out/target/common/obj/JAVA_LIBRARIES/mms-common_intermediates/classes.jar Copying: out/target/common/obj/APPS/Bluetooth_intermediates/noproguard.classes.jar target Symbolic: libaudioutils (out/target/product/generic/symbols/system/lib/libaudioutils.so) target SharedLib: libbacktrace (out/target/product/generic/obj/SHARED_LIBRARIES/libbacktrace_intermediates/LINKED/libbacktrace.so) target Symbolic: libcamera_metadata (out/target/product/generic/symbols/system/lib/libcamera_metadata.so) target Symbolic: libhardware (out/target/product/generic/symbols/system/lib/libhardware.so) ****************************** You have tried to change the API from what has been previously approved. To make these errors go away, you have two choices: 1) You can add "@hide" javadoc comments to the methods, etc. listed in the errors above. 2) You can update current.txt by executing the following command: make update-api To submit the revised current.txt to the main Android repository, you will need approval. ****************************** make: *** [out/target/common/obj/PACKAGING/checkpublicapi-current-timestamp] Error 38 make: *** Waiting for unfinished jobs.... Command exited with non-zero status 2
需要执行如下命令:
1
2
$ cd ~/android-source/android-5.1.1_r26/ $ make update-api
编译源码 1 2 3 4 5 6 7 8 9 10 11 12 13 14 15 16 17 18 19 20 21 22 23 24 25 26 27 28 29 30 31 32 $ cd ~/android-source/android-5.1.1_r26/ # 初始化环境变量 $ . build/envsetup.sh # 选择平台编译选项 $ lunch You're building on Linux Lunch menu... pick a combo: 1. aosp_arm-eng 2. aosp_arm64-eng 3. aosp_mips-eng 4. aosp_mips64-eng 5. aosp_x86-eng 6. aosp_x86_64-eng 7. aosp_manta-userdebug 8. aosp_deb-userdebug 9. full_fugu-userdebug 10. aosp_fugu-userdebug 11. aosp_flo-userdebug 12. aosp_tilapia-userdebug 13. aosp_grouper-userdebug 14. aosp_flounder-userdebug 15. aosp_shamu-userdebug 16. mini_emulator_arm64-userdebug 17. mini_emulator_x86-userdebug 18. mini_emulator_x86_64-userdebug 19. m_e_arm-userdebug 20. mini_emulator_mips-userdebug 21. aosp_mako-userdebug 22. aosp_hammerhead-userdebug Which would you like? [aosp_arm-eng]
根据真机驱动 中的内容,我们这里需要输入 15 选择 aosp_shamu-userdebug 并按回车键确认。
执行如下命令,开始正式编译 Android 源代码:
说明
-j 后面的数字,用于指定并行任务的数量。通常是 CPU 核数的一或两倍。
若编译成功,会看到如下 Log:
1 2 3 4 5 6 7 8 9 10 11 12 13 14 15 16 17 18 19 20 21 22 23 24 25 26 27 28 29 30 31 32 33 ...... target Strip: libwebviewchromium (out/target/product/shamu/obj/lib/libwebviewchromium.so) Install: out/target/product/shamu/system/lib/libwebviewchromium.so Install: out/target/product/shamu/system/app/webview/webview.apk mkdir -p out/target/product/shamu/system/app/webview/lib/arm ;ln -sf /system/lib/libwebviewchromium.so out/target/product/shamu/system/app/webview/lib/arm/libwebviewchromium.so Install: out/target/product/shamu/system/priv-app/Settings/Settings.apk build/tools/generate-notice-files.py out/target/product/shamu/obj/NOTICE.txt out/target/product/shamu/obj/NOTICE.html "Notices for files contained in the filesystem images in this directory:" out/target/product/shamu/obj/NOTICE_FILES/src Combining NOTICE files into HTML Combining NOTICE files into text Installed file list: out/target/product/shamu/installed-files.txt Target system fs image: out/target/product/shamu/obj/PACKAGING/systemimage_intermediates/system.img Running: mkuserimg.sh -s out/target/product/shamu/system out/target/product/shamu/obj/PACKAGING/systemimage_intermediates/system.img ext4 system 2130538496 out/target/product/shamu/root/file_contexts make_ext4fs -s -T -1 -S out/target/product/shamu/root/file_contexts -l 2130538496 -a system out/target/product/shamu/obj/PACKAGING/systemimage_intermediates/system.img out/target/product/shamu/system Creating filesystem with parameters: Size: 2130538496 Block size: 4096 Blocks per group: 32768 Inodes per group: 8128 Inode size: 256 Journal blocks: 8127 Label: Blocks: 520151 Block groups: 16 Reserved block group size: 127 Created filesystem with 1782/130048 inodes and 154288/520151 blocks build_verity_tree -A aee087a5be3b982978c923f566a94613496b417f2af592639bc80d141e34dfe7 out/target/product/shamu/obj/PACKAGING/systemimage_intermediates/system.img /tmp/tmpnMFZT5_verity_images/verity.img system/extras/verity/build_verity_metadata.py 2130538496 /tmp/tmpnMFZT5_verity_images/verity_metadata.img 86e77c8ceac2d4248a46ad18979b2ddaf51c0a1889ff8b22ae39bef55abc77c8 aee087a5be3b982978c923f566a94613496b417f2af592639bc80d141e34dfe7 /dev/block/platform/msm_sdcc.1/by-name/system out/host/linux-x86/bin/verity_signer build/target/product/security/verity.pk8 append2simg out/target/product/shamu/obj/PACKAGING/systemimage_intermediates/system.img /tmp/tmpnMFZT5_verity_images/verity_metadata.img append2simg out/target/product/shamu/obj/PACKAGING/systemimage_intermediates/system.img /tmp/tmpnMFZT5_verity_images/verity.img Install system fs image: out/target/product/shamu/system.img out/target/product/shamu/system.img+out/target/product/shamu/obj/PACKAGING/recovery_patch_intermediates/recovery_from_boot.p maxsize=2192424960 blocksize=135168 total=615381140 reserve=22167552 #
编译完之后,会多出一个 out 文件夹,大小为 28G。编译生成的镜像文件位置:
1 ~/android-source/android-5.1.1_r26/out/target/product/shamu/system.img
该文件大小为 587M。
而编译之后的整个 ~/android-source/android-5.1.1_r26/ 文件夹大小为 109G。
刷写 Nexus 6 设备 解锁引导加载程序 只有在引导加载程序允许的情况下,您才可以刷写定制系统,而引导加载程序默认处于锁定状态。您可以解锁引导加载程序,但这样做会导致系统出于隐私原因而删除用户数据。解锁之后,系统会清空设备上的所有数据,即应用中的个人数据以及可通过 USB 访问的共享数据(包括照片和影片)。请先备份设备上的所有重要文件,然后再尝试解锁引导加载程序。
您只需解锁引导加载程序一次,并可视需要将其重新锁定。
解锁新款设备 自 2014 年以来发布的所有 Nexus 和 Pixel 设备(从 Nexus 6 和 Nexus 9 开始)都内置有恢复出厂设置保护功能,需要执行多个步骤才能解锁引导加载程序。
要在设备上启用 OEM 解锁功能,请执行以下操作:
在“设置”中,点按关于手机 ,然后点按版本号 七 (7) 次。
当看到“您已处于开发者模式”这条消息后,点按返回 按钮。
点按开发者选项 ,然后启用 OEM 解锁 和 USB 调试 (如果 OEM 解锁 处于停用状态,请连接到互联网,以便设备可以至少签到一次。如果“OEM 解锁”仍处于停用状态,则说明设备可能已被运营商锁定 SIM 卡,系统无法解锁引导加载程序)。
重新启动进入引导加载程序,然后使用 fastboot 解锁。
对于新款设备(2015 年及之后发布的设备):
1 $ fastboot flashing unlock
对于老款设备(2014 年及之前发布的设备):
在屏幕上确认解锁。
重新锁定引导加载程序 要重新锁定引导加载程序,请执行以下命令:
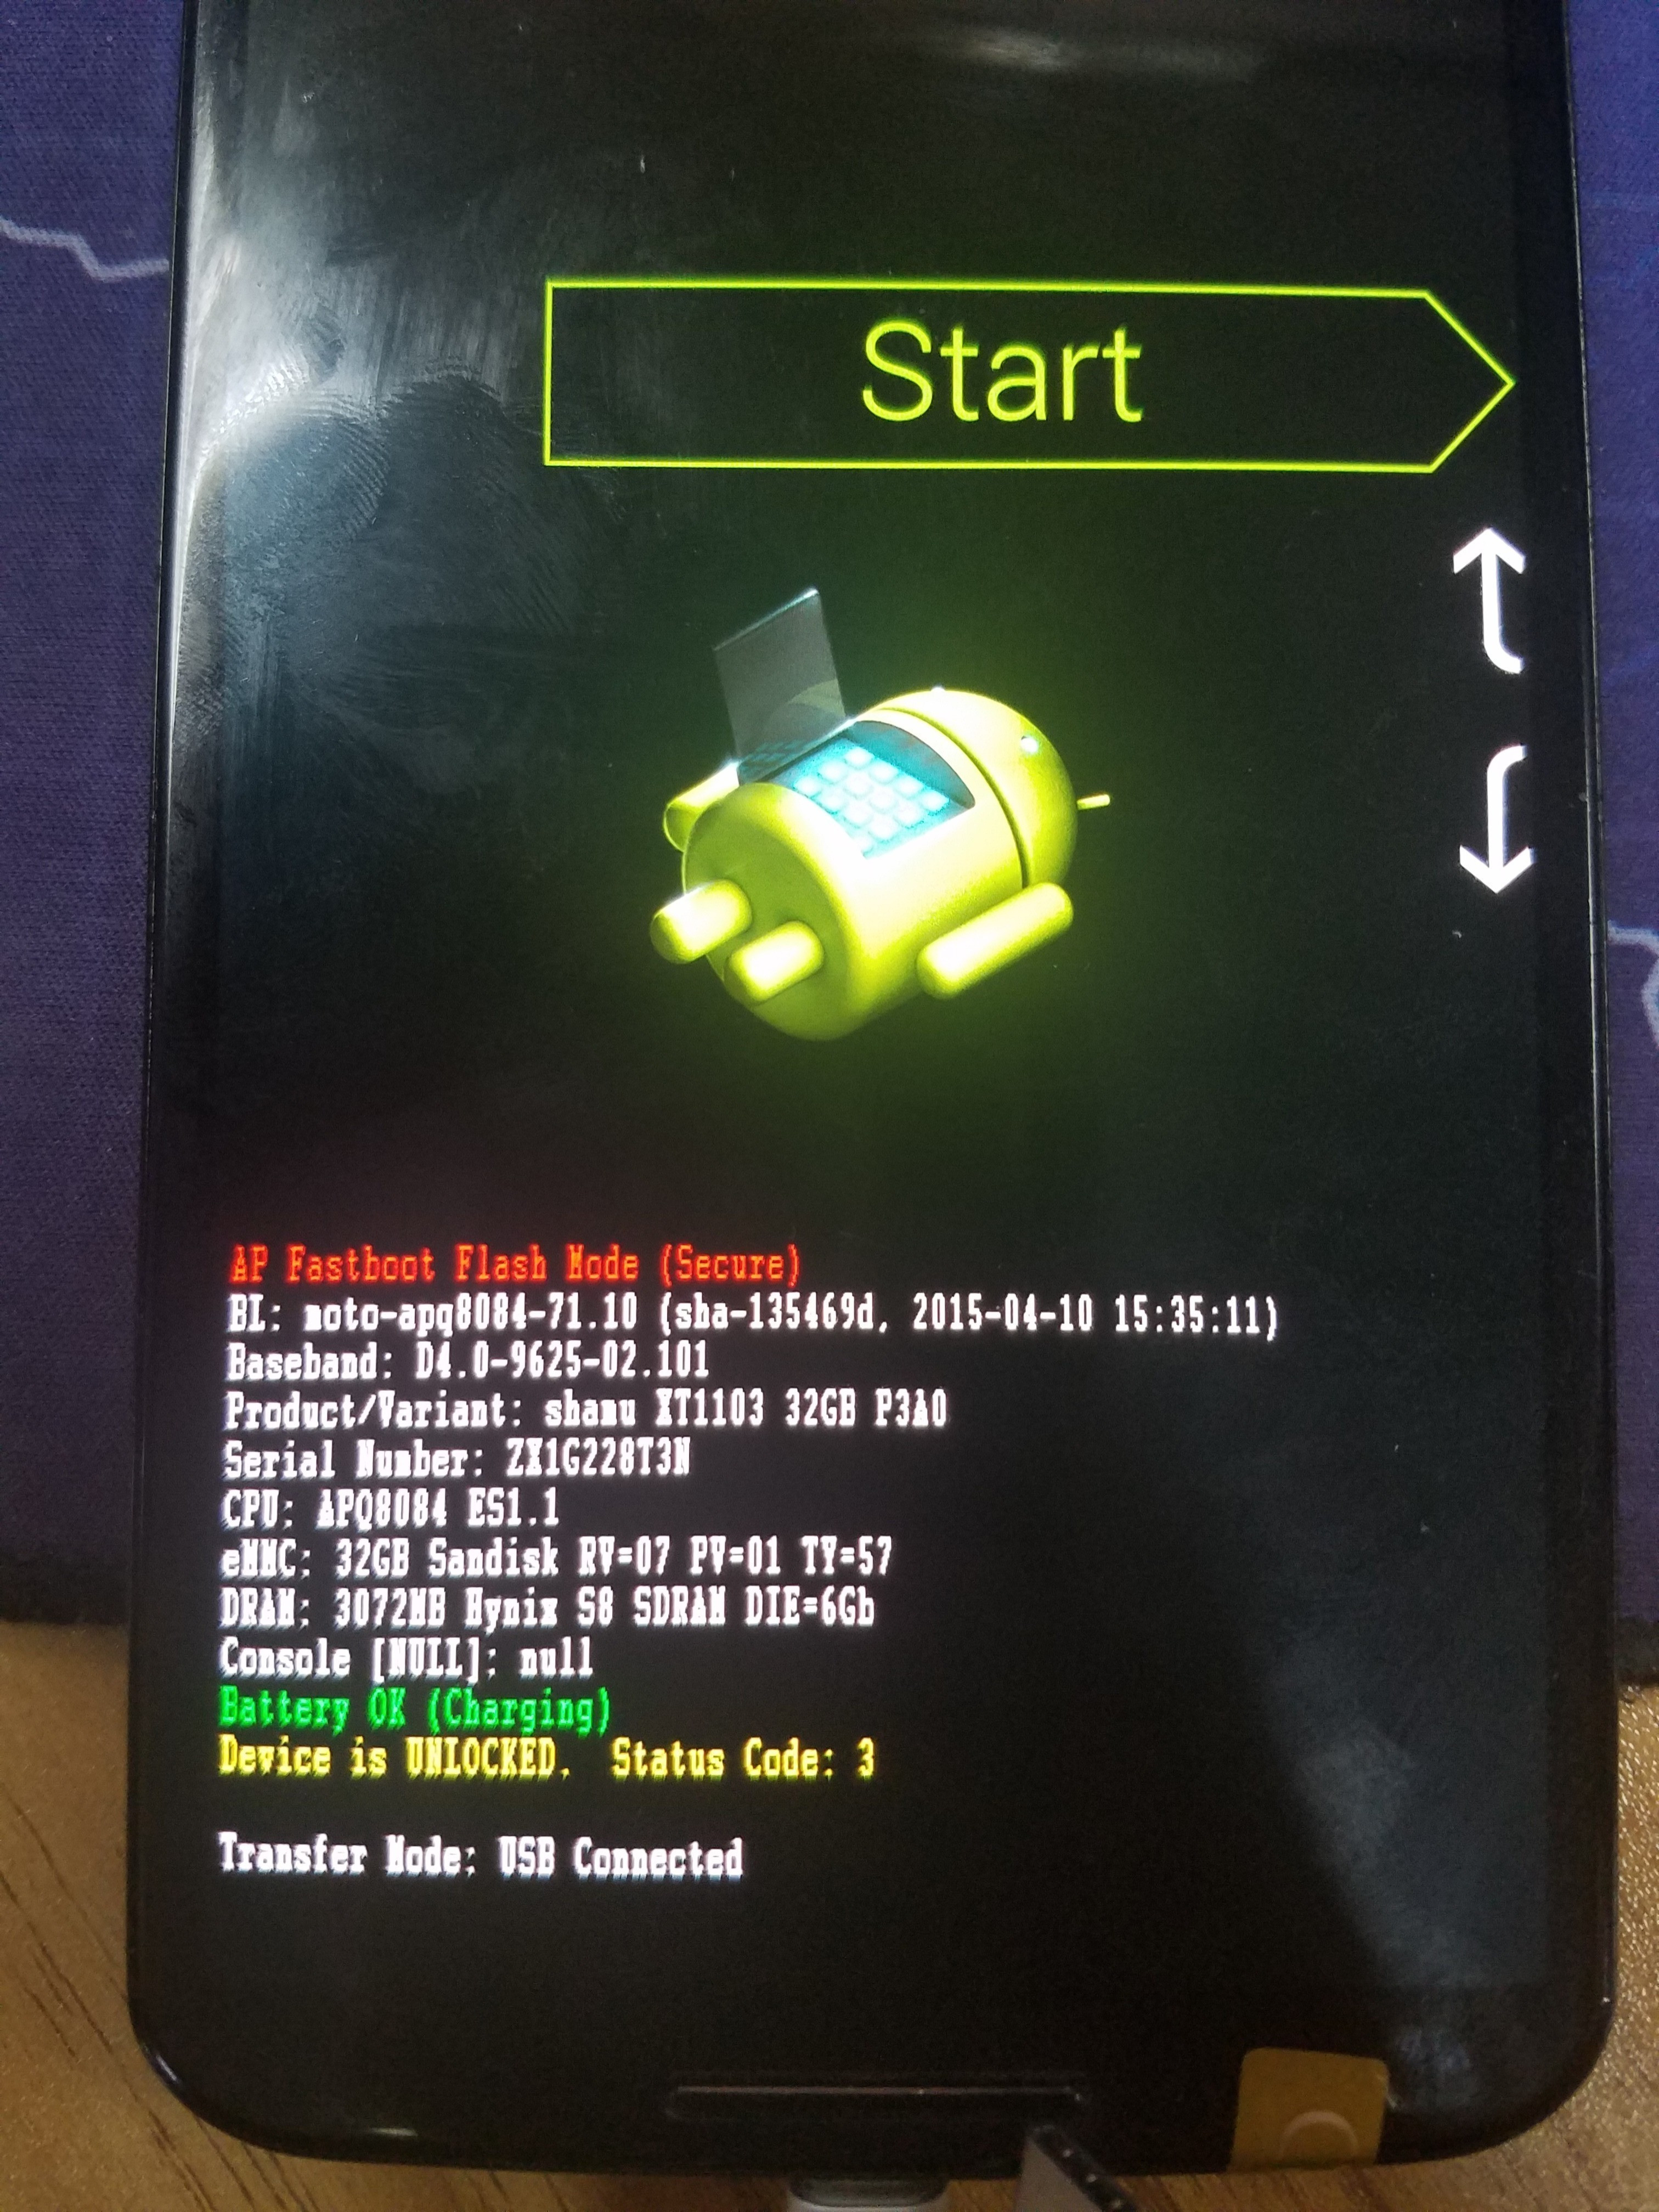
进入 fastboot 模式 根据官方文档 的提示,先将手机关机,之后同时按住电源键和音量调低键,进入 fastboot 模式。
刷写设备 之前编译完源代码之后,会多出一个 out 文件夹,生产的镜像文件都在这里。执行如下命令,开始刷写镜像:
1 $ cd ~/android-source/android-5.1.1_r26/out/target/product/shamu/
1 2 3 4 5 6 7 $ fastboot flash recovery recovery.img target reported max download size of 536870912 bytes sending 'recovery' (8337 KB)... OKAY [ 0.263s] writing 'recovery'... OKAY [ 0.159s] finished. total time: 0.422s
1 2 3 4 5 6 7 $ fastboot flash boot boot.img target reported max download size of 536870912 bytes sending 'boot' (7745 KB)... OKAY [ 0.244s] writing 'boot'... OKAY [ 0.114s] finished. total time: 0.358s
1 2 3 4 5 6 7 8 9 10 11 $ fastboot flash system system.img target reported max download size of 536870912 bytes sending sparse 'system' (518573 KB)... OKAY [ 16.363s] writing 'system'... OKAY [ 7.690s] sending sparse 'system' (81766 KB)... OKAY [ 2.589s] writing 'system'... OKAY [ 1.365s] finished. total time: 28.006s
以下两个镜像可根据需要选择性的进行刷新。若刷新 cache.img,userdata.img 的话,原手机的里内容会被清空。
1 2 3 4 5 6 7 8 9 $ fastboot flash cache cache.img target reported max download size of 536870912 bytes erasing 'cache'... OKAY [ 0.029s] sending 'cache' (6248 KB)... OKAY [ 0.198s] writing 'cache'... OKAY [ 0.111s] finished. total time: 0.338s
1 2 3 4 5 6 7 8 9 10 11 $ fastboot flash userdata userdata.img target reported max download size of 536870912 bytes erasing 'userdata'... OKAY [ 1.181s] sending 'userdata' (139036 KB)... OKAY [ 4.354s] writing 'userdata'... OKAY [ 2.616s] finished. total time: 8.151s
最后重启手机:
1 2 3 4 $ fastboot reboot rebooting... finished. total time: 0.151s
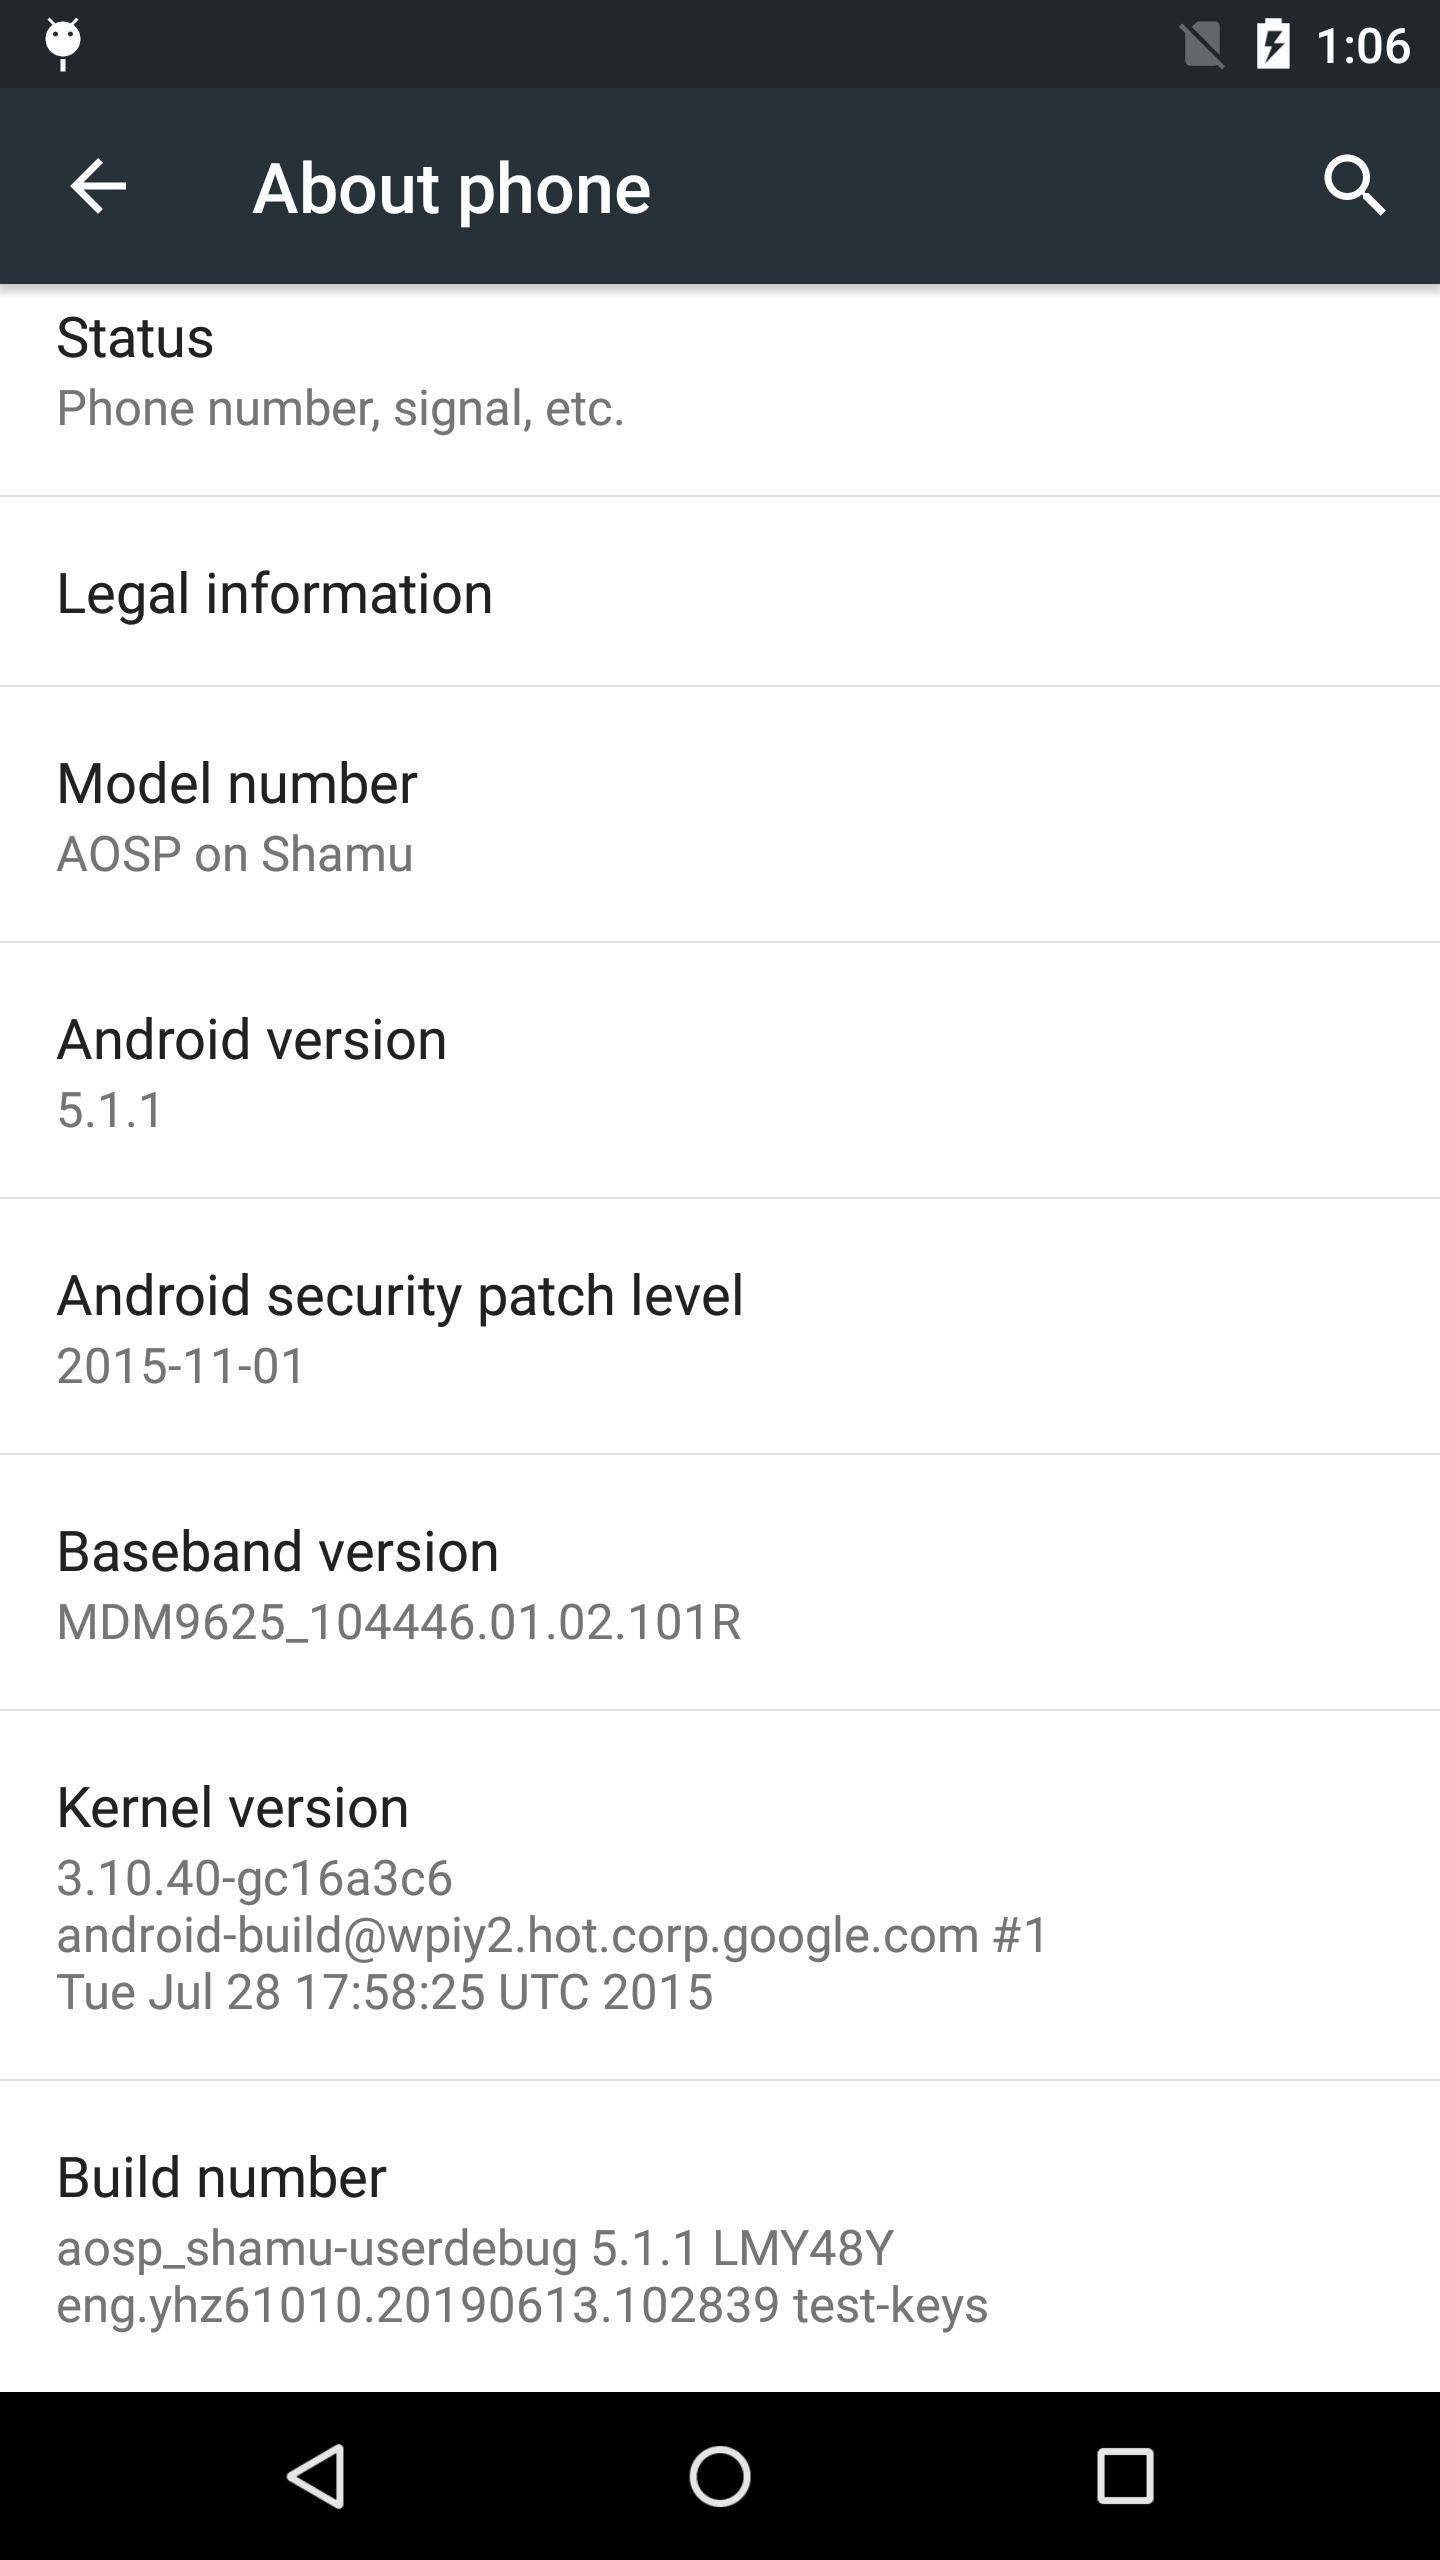
刷机后查看设备信息:
参考文献
在Ubuntu 18.04.1系统中安装Jdk 7(openjdk-7-jdk) Ubuntu 下 Nexus 6 保留数据线刷 Android 5.1.1