简述
本要主要讲解在 Mac 下(其它平台类似) Android Studio 如何使用 SonarQube 进行代码检查。
关于什么是 SonarQube,这里就不再赘述了,百度一下即可。它的目的就是持续分析及衡量代码质量 (continuously analyze and measure technical quality)
前提条件
关于 SonarQube,本文只讲解如何进行安装及配置。至于在安装 SonarQube 之前需要安装的软件,需要读者自行安装。
需要提前安装的软件有:
- Java SDK
- MySQL
以上软件请根据自己的平台进行安装。
系统环境说明
本人的开发环境如下:
- Mac OS 10.13.3 (17D47)
- SonarQube Version 7.0 (build 36138)
- Java 1.8.0u152
- MySQL 5.7.21
Android 环境如下:
- Android Studio 3.0.1
- Gradle Version 4.1
- Android Plguin Version 3.0.1
SonarQube 安装及配置
安装
从官网下载最新版 SonarQube 7.0,并解压到指定的文件夹。例如:/Users/yhz61010/Downloads/sonarqube-7.0/
配置
SQL 配置
默认情况下, SonarQube 使用是的内嵌的 H2 数据库。生产环境下需要换成其它数据库,例如 MySQL,Postgres 等。
这里以 MySQL 为例进行说明。
创建 DB 及 用户
登录 MySQL
1 | $ mysql -uroot -p |
创建数据库
1 | mysql> CREATE DATABASE sonar CHARACTER SET utf8 COLLATE utf8_general_ci; |
创建名为 sonar 密码为 sonar 的用户
(因为下文中提到的 SonarQube 配置文件中默认的用户名及密码为 sonar)
1 | mysql> CREATE USER 'sonar'@'localhost' IDENTIFIED BY 'sonar'; |
设置并刷新权限
1 | mysql> GRANT ALL PRIVILEGES ON * . * TO 'sonar'@'localhost'; |
SonarQube 配置文件
修改如下配置文件:
1 | vim <SonarQube 安装路径>/sonarqube-7.0/conf/sonar.properties |
去掉必要行的注释,结果如下:
1 | # User credentials. |
运行 SonarQube
<SonarQube 安装路径>/sonarqube-7.0/bin/下面有各种平台的可执行文件(Windows, Linux, Mac),这里以 Mac 平台为例。
完成上面所有的配置之后,可以执行 SonarQube 如下常用命令:
启动 SonarQube
1 | $ cd <SonarQube 安装路径>/sonarqube-7.0/bin/macosx-universal-64 |
查看 SonarQube 启动状态
1 | $ ./sonar.sh status |
停止 SonarQube
1 | $ ./sonar.sh stop |
重启 SonarQube
1 | $ ./sonar.sh restart |
查看其它命令
1 | $ ./sonar.sh |
访问 SonarQube
SonarQube 默认的端口是 9000,因此在浏览器中打开如下地址:http://localhost:9000/
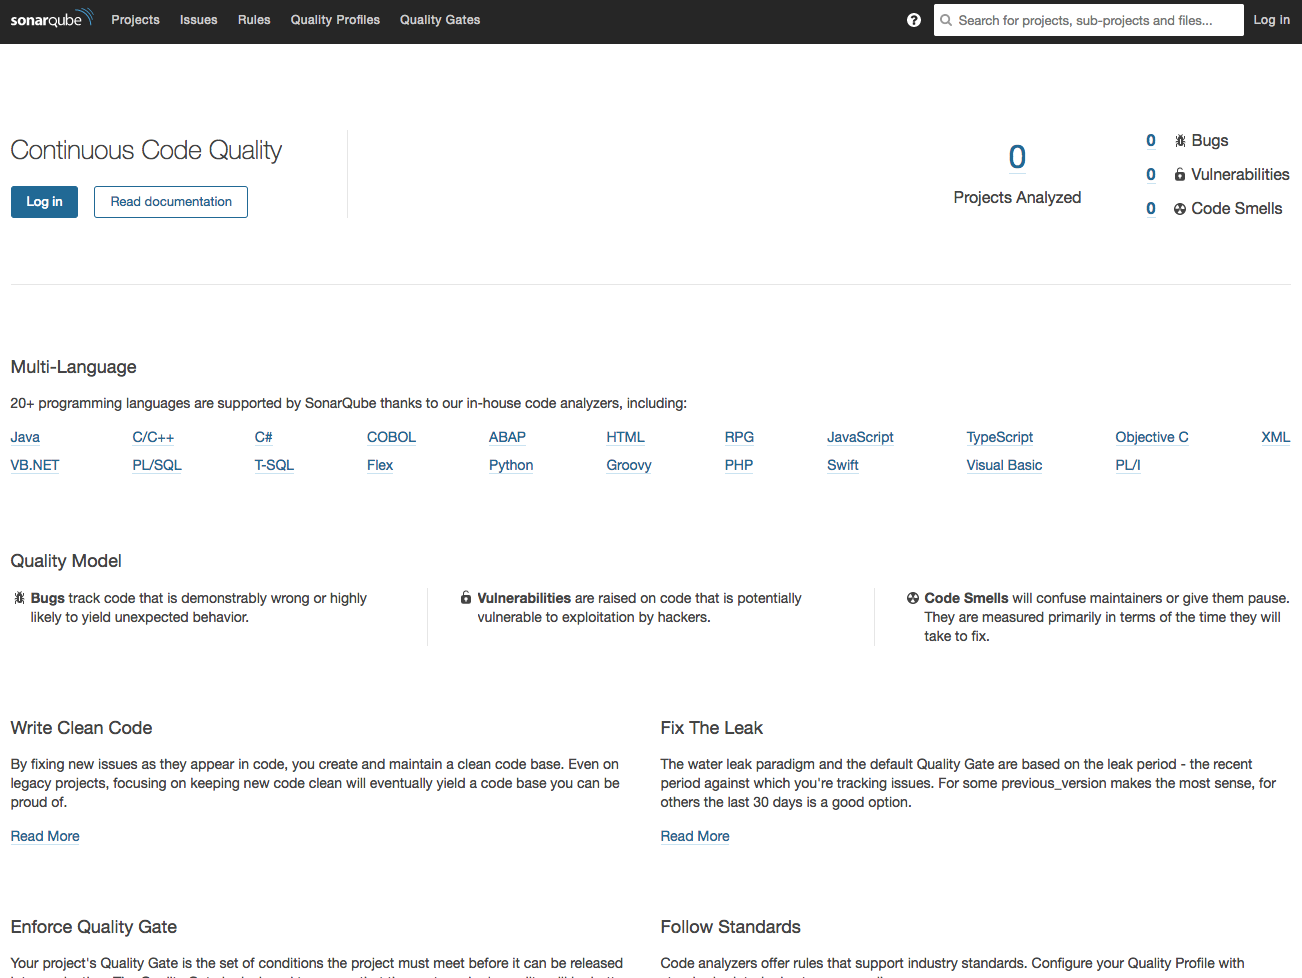
点击右上角的 Log in 登录,默认的用户名及密码均为 admin。
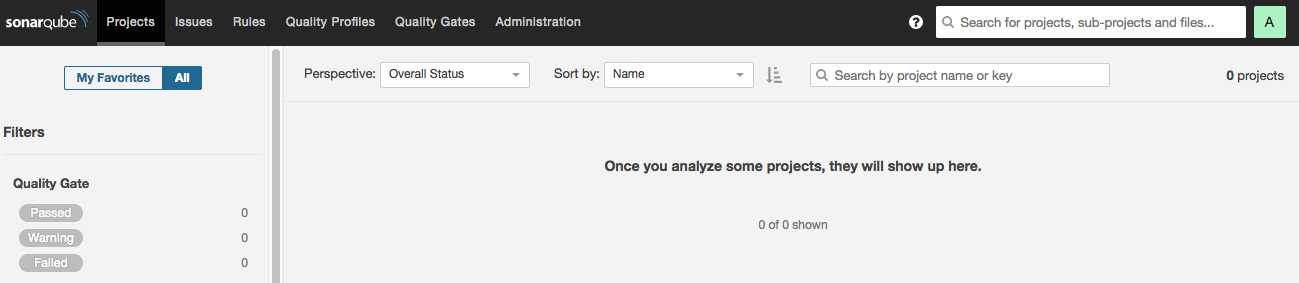
登录后的页面如下:
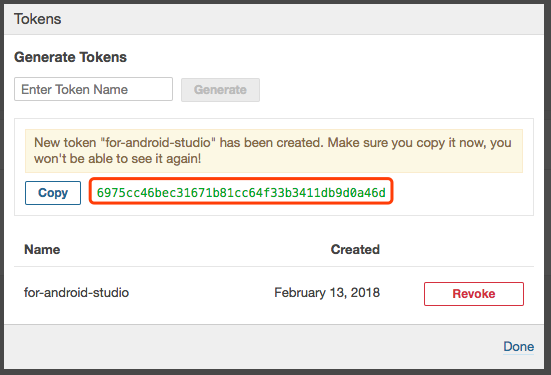
获取 User Token
在 Android Studio 中设置 SonarQube 时,需要用到 SonarQube 的用户名及密码。显然,暴露这些重要信息是很不安全的。因此安全起见,我们不会在 Android Studio 直接使用 SonarQube 的用户名及密码,而是使用 Token。
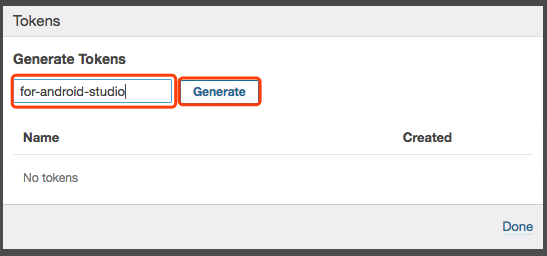
获取 Token 的方法也很简单,不过请**注意**,
保存好 Token,
保存好 Token,
保存好 Token,
重要的事情说三遍,因为您以后没有第二次机会查看 Token 值: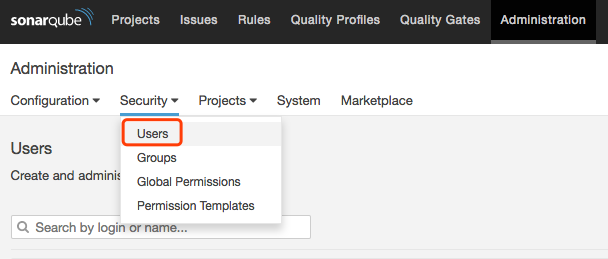

在 Android Studio 中添加 SonarQube
在项目根目录下的 build.gradle 中添加如下代码:
1 | buildscript { |
在 Module 目录下的 build.gradle 中添加如下代码:
1 | apply plugin: "org.sonarqube" |
到这里 Android Studio 的 SonarQube 设置就全部完成了。
使用 SonarQube 检查代码
前提:需要安装 Gradle,或者使用 Android Studio 创建项目时下载的 Gradle。
进入你的 Android Studio 项目目录,并如何如下命令开始检查代码:
1 | $ cd <Android Studio 项目根目录>/ |
看到 BUILD SUCCESSFUL,恭喜你,代码已经检查完成。
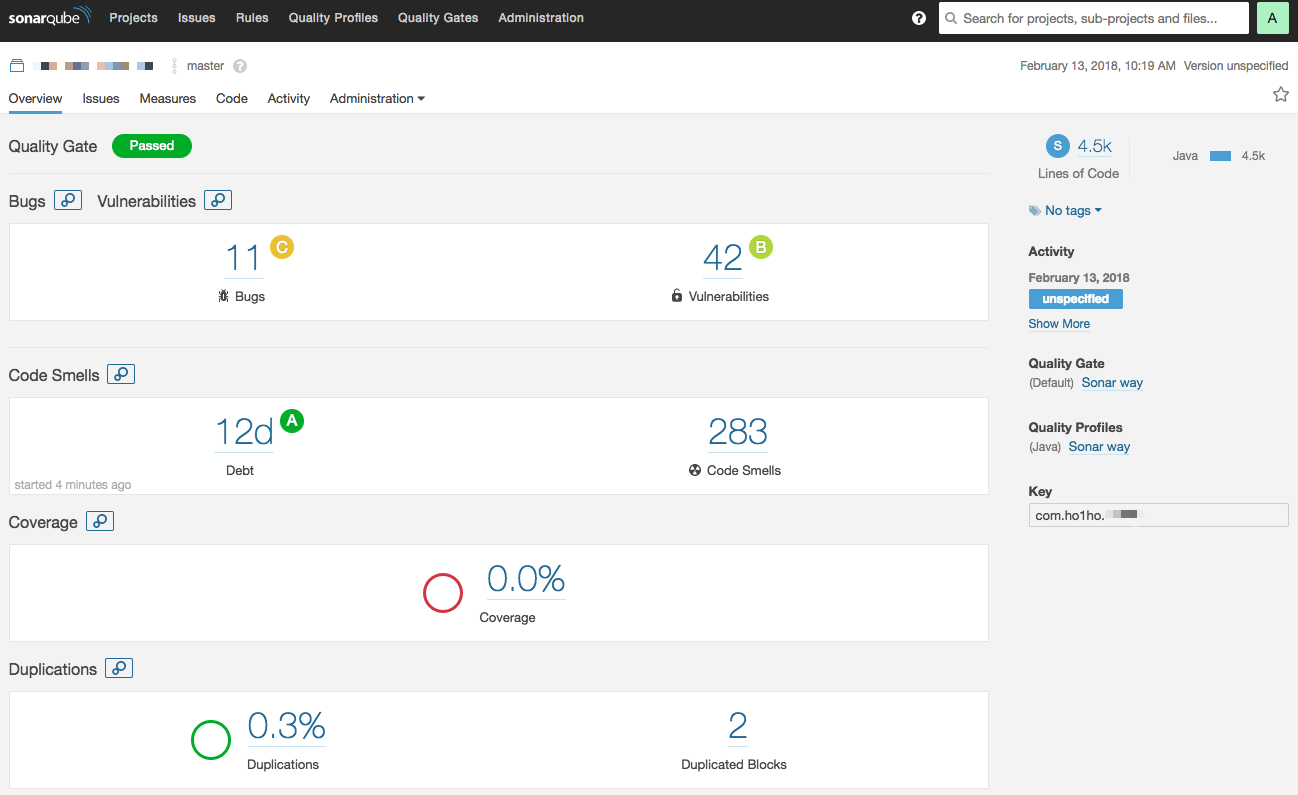
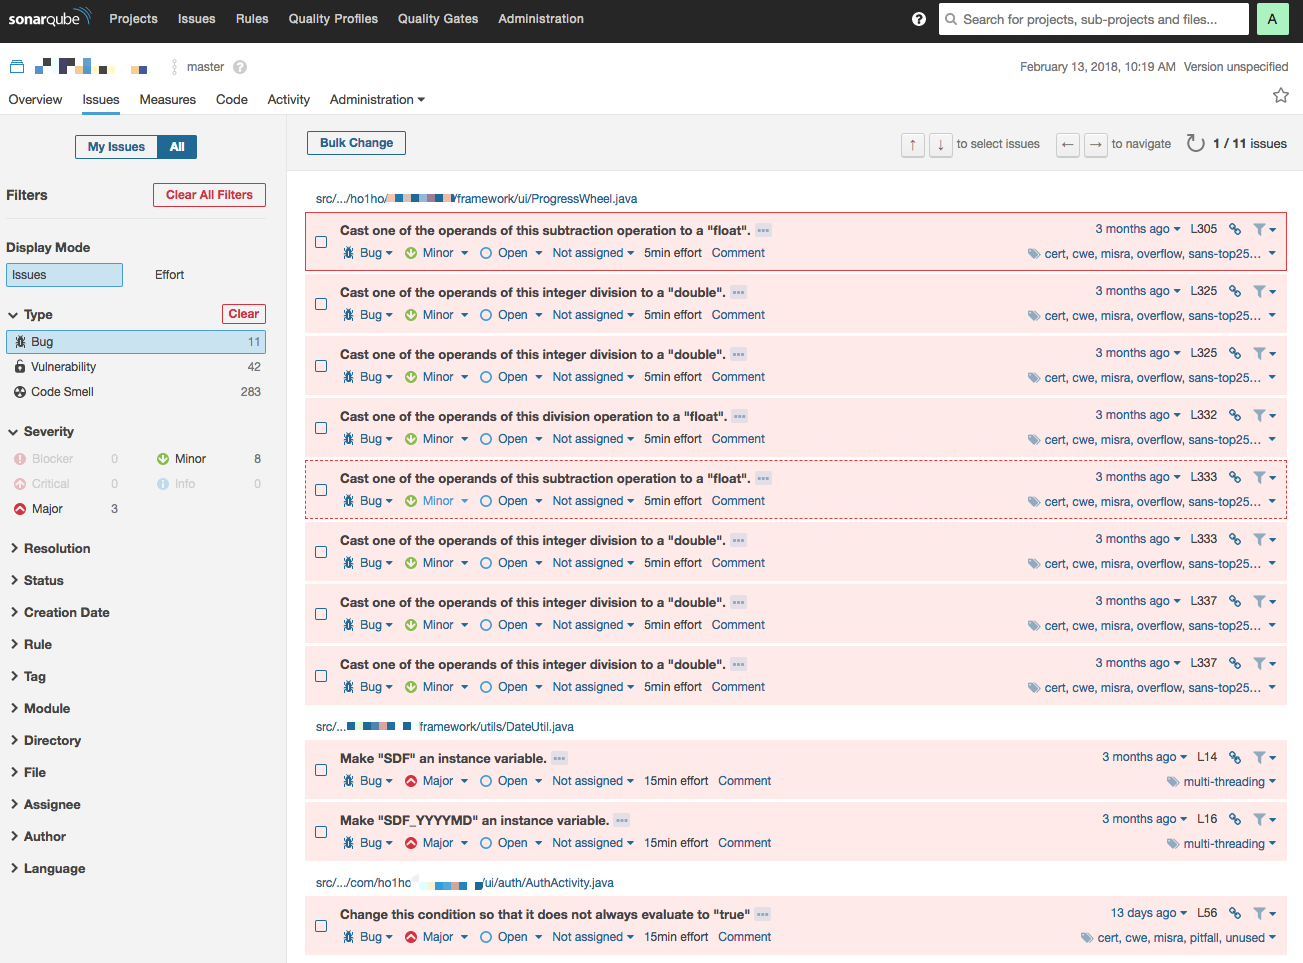
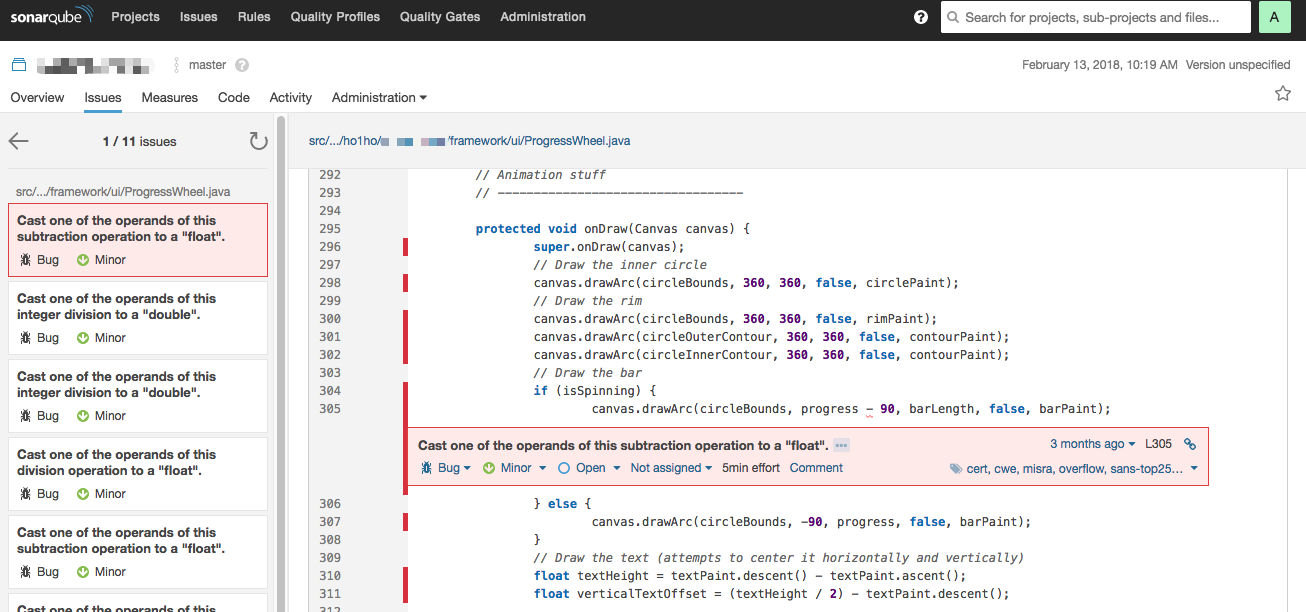
访问 SonarQube 查看检查结果
依然在浏览器中打开 SonarQube 的访问地址:http://localhost:9000/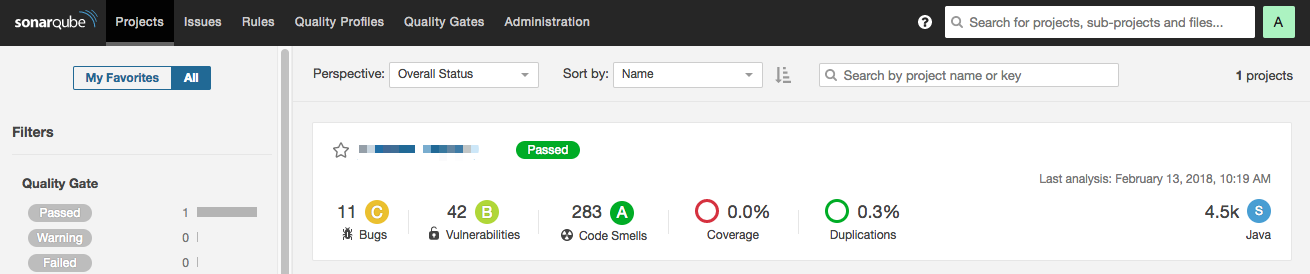
总结
作为静态代码检查工具,SonarQube 确实能发现项目中潜在的问题,对于提高代码质量还是很有帮助的。而且它可以和 Jenkins 整合在一起极大的提高工作效率。
不过再智能的工具也有它不智能的一面。虽然它可以检查出很多问题,但是我发现其中也有很多问题其实并不是问题。例如很多被认为是 Bug 级别的问题,但在你查看代码后,你会发现这其实仅仅是一个在程序设计时特意为之的事情,而 SonarQube 并不知晓,只能作出一个善意的提醒。